

Why You’ll Enjoy This Project
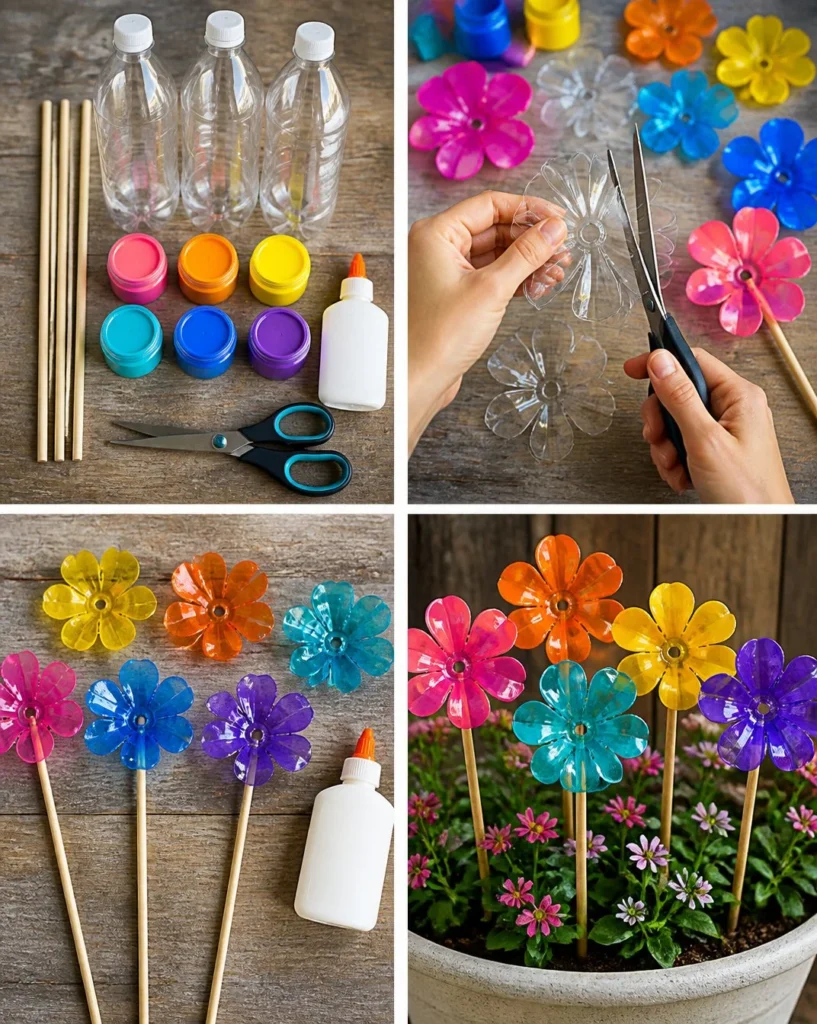
Making Rainbow Flower Garden Stakes from recycled bottles is a wonderful way to add color and charm to your garden or patio. This project is enjoyable because it:
- Promotes Recycling: You’re turning everyday plastic bottles into something beautiful, helping to reduce waste.
- Encourages Creativity: Let your imagination run wild as you choose colors and flower shapes, making each stake unique.
- Suits All Ages: It’s a simple craft that kids and adults can enjoy together, fostering quality family time.
- Brightens up Spaces: These colorful garden stakes are a perfect way to add some cheer to your outdoor arrangements.
- Accessible and Inexpensive: Using mostly recycled materials means this project is lightweight on the budget and easy to gather supplies for.
Materials You’ll Need
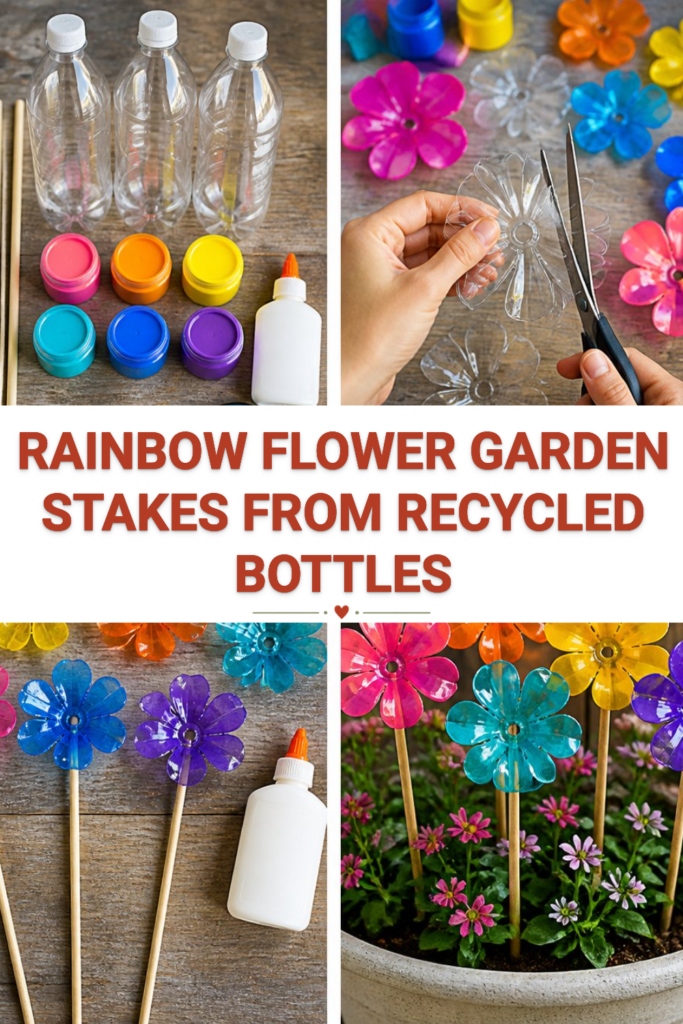
To create your Rainbow Flower Garden Stakes, gather these materials:
- 3 clear plastic bottles (soda or water bottles work well)
- Acrylic paint in pink, orange, yellow, turquoise, blue, and purple
- 3 wooden garden stakes
- Glue (strong craft glue or hot glue)
- Scissors (adult supervision needed)
If you don’t have acrylic paint, you can use any type of outdoor-safe paint. Ensure your glue is suitable for plastic to achieve the best results.
How to Make Rainbow Flower Garden Stakes Made from Recycled Bottles
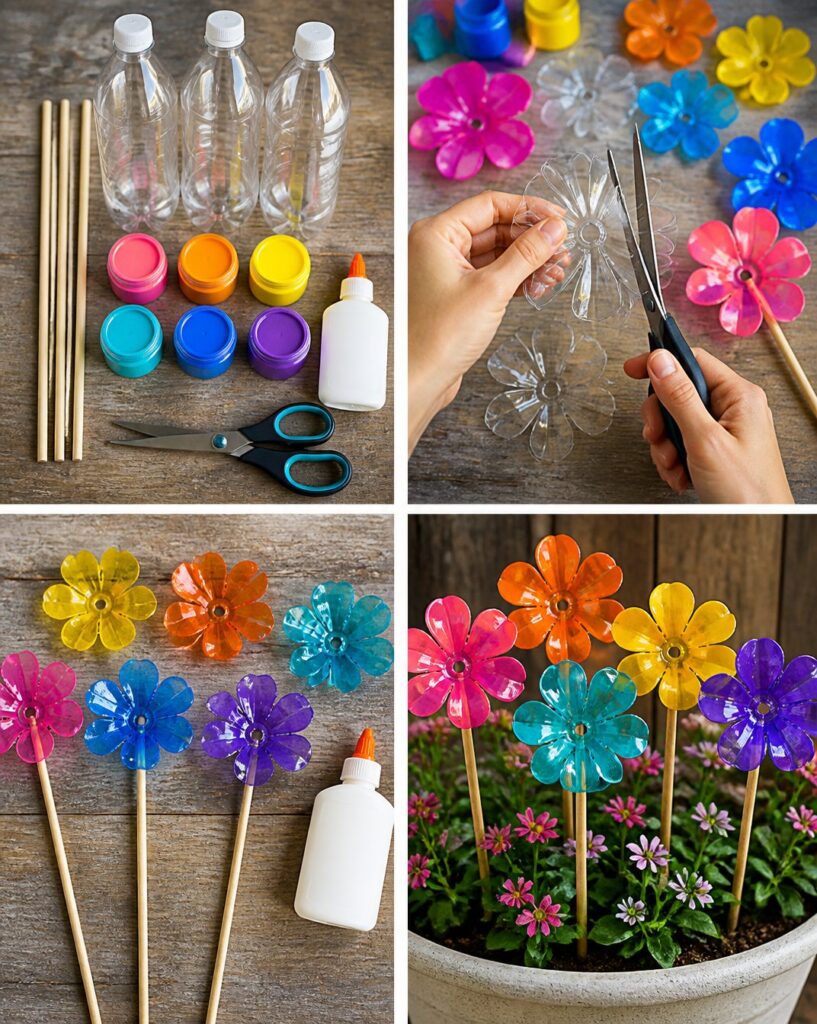
- Wash and Dry the Bottles: Rinse the plastic bottles thoroughly to remove any labels or residue. Let them dry completely.
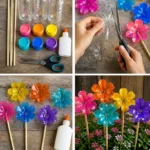
- Cut Flower Shapes: With adult supervision, carefully cut the bottoms off the plastic bottles. Shape the bottom into a flower design, making sure to create petals. Round the edges of each petal for a softer look.
- Paint the Petals: Using the acrylic paint, color each flower petal in a rainbow of hues. Don’t be afraid to mix colors or create patterns! Allow the paint to dry completely.
- Glue the Flowers to the Stakes: Once the paint is dry, use the glue to attach each flower securely to a wooden garden stake. Make sure it’s firmly in place for stability.
- Let the Glue Cure: Allow the glue to dry according to the manufacturer’s instructions. This step is important for ensuring your flowers stay attached.
- Arrange Your Garden Stakes: Once everything is dry and secure, place the colorful stakes in your garden or in a planter. Have fun arranging them in a way that brings joy to your outdoor space!
Helpful Tips
- Cutting Safety: When cutting the bottles, make sure to keep fingers away from the scissors and use a steady hand. If younger children are involved, let them decorate the flowers after you’ve completed the cutting.
- Painting Cleanly: To avoid drips, apply a thin layer of paint and let it dry before applying more. Use a small paintbrush for detail.
- Curing Time: If you’re using hot glue, be cautious of the heat. Give the glue ample time to set so your flowers don’t fall off.
- Displaying Your Flowers: When placing your stakes outside, consider a spot where they’ll get sunlight but won’t be easily toppled by wind.
Easy Variations
- Seasonal Themes: Change the colors based on the season, like fall colors (reds, oranges, and browns) or pastel shades for spring.
- Different Shapes: Experiment with different designs beyond flowers, such as stars or hearts, using the same bottle technique.
- Mini Stakes: Use smaller bottle bottoms to create mini garden stakes or markers for plant names.
- Natural Accents: Add embellishments like twigs or leaves glued to the stakes for a more natural look.
- Glow-in-the-Dark Paint: For a fun twist, try using glow-in-the-dark paint so your stakes can shine at night!
Making This Craft With Kids
This project is perfect for kids with some adult supervision, especially during the cutting step. You’ll want to help them safely handle the scissors and gluing. Kids can freely express their creativity through painting and designing their flower shapes, making this a fun family project.
How to Display or Use It
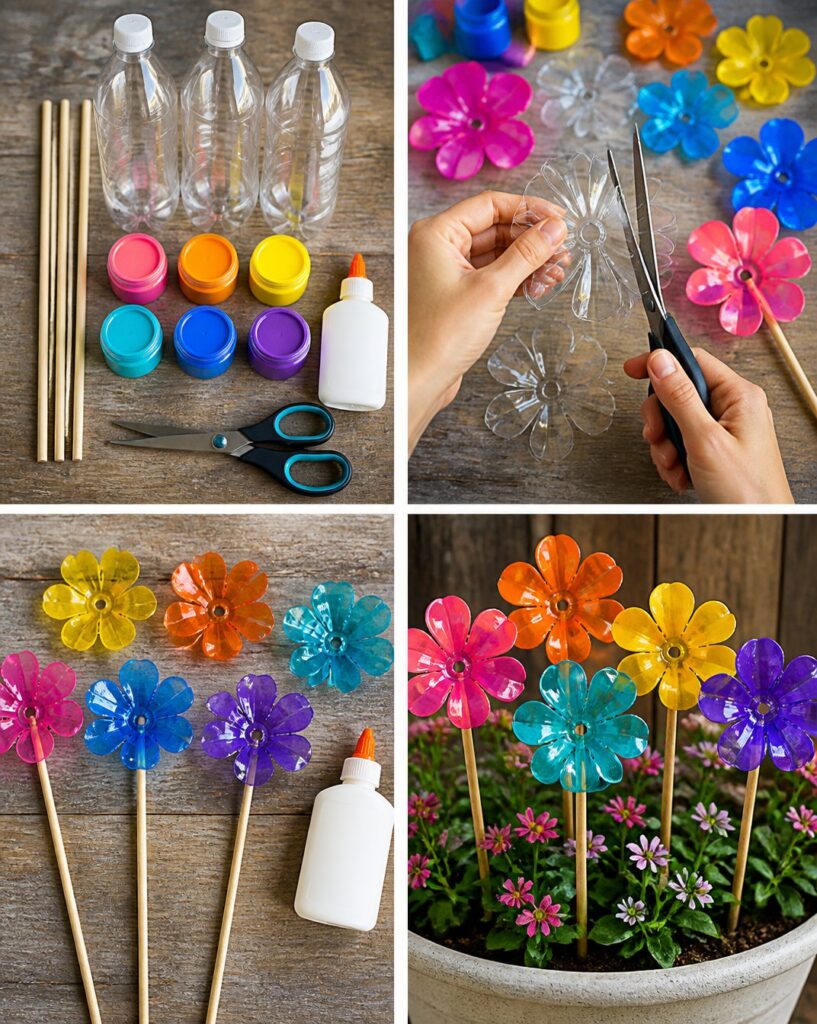
These vibrant garden stakes can bring life to flower beds, vegetable gardens, or potted plants. Arrange them in clusters for a bold effect or mix them with real flowers for a delightful contrast. They could also make thoughtful gifts for neighbors or friends who enjoy gardening!
Frequently Asked Questions
Q1: Can I use colored bottles instead of clear ones?
A1: Yes, colored bottles can add an interesting twist to your flowers; just make sure they are clean and safe for outdoor use.
Q2: How long does the paint take to dry?
A2: Drying times vary, but acrylic paint typically dries within 1-2 hours. It’s best to wait until it is completely dry before gluing.
Q3: What if I don’t have wooden stakes?
A3: You can use sturdy sticks from your backyard, bamboo skewers, or even thick dowels as an alternative.
Q4: Is this project waterproof?
A4: While acrylic paint is water-resistant, prolonged exposure to rain may cause the paint to fade. Consider bringing them inside during heavy rain.
Q5: How can I store them during the winter?
A5: If you live in a colder climate, it’s best to bring the stakes indoors to prevent damage from snow or ice.
Q6: Can I use hot glue for this project?
A6: Yes, hot glue works well, but be cautious of the heat. Adult supervision is advised when using hot glue guns.
Rainbow Flower Garden Stakes
- Total Time: 1 hour
- Makes: 6 garden stakes
Description
Create vibrant and colorful garden stakes from recycled plastic bottles, perfect for adding charm and personality to your outdoor space.
Materials
- 3 clear plastic bottles
- Acrylic paint in pink, orange, yellow, turquoise, blue, and purple
- 3 wooden garden stakes
- Strong craft glue or hot glue
- Scissors (adult supervision needed)
Instructions
- Wash and dry the bottles thoroughly to remove any labels or residue.
- Cut the bottoms off the plastic bottles into flower shapes with adult supervision.
- Paint each petal with acrylic paint and allow to dry completely.
- Glue the painted flowers securely onto the wooden garden stakes.
- Let the glue cure according to the manufacturer’s instructions.
- Arrange the colorful stakes in your garden or planter as desired.
Notes
Safety first when using scissors! Use thin layers of paint to avoid drips.