
Rainbow Cupcake-Liner Dahlia Bouquet
Creating a colorful bouquet of flowers is a delightful way to brighten any space. With this Rainbow Cupcake-Liner Dahlia Bouquet project, you’ll use simple materials to craft vibrant blooms that showcase both creativity and nature’s beauty. This fun and easy activity is perfect for families, allowing everyone to express their artistic flair while making something wonderful together.
Get ready to dive into crafting as you transform ordinary cupcake liners into stunning flowers. Whether for a special occasion or just because, these cheerful blooms will bring joy to your home or make a lovely gift for someone special!
Why You’ll Enjoy This Project
- Colorful Fun: Using bright cupcake liners means your bouquet will be bursting with color, making it visually striking and engaging for all ages.
- Easy to Make: The steps are straightforward, so this project is perfect for beginners or even kids with adult supervision.
- Good for All Ages: Families can work together, allowing children to practice fine motor skills while creating something they can be proud of.
- Customizable: Switch up colors or change the flower size to make each bouquet unique to your taste and style.
- Great for Gifting: These bouquets make wonderful gifts for friends, family, or as decorations for parties and celebrations.
Materials You’ll Need
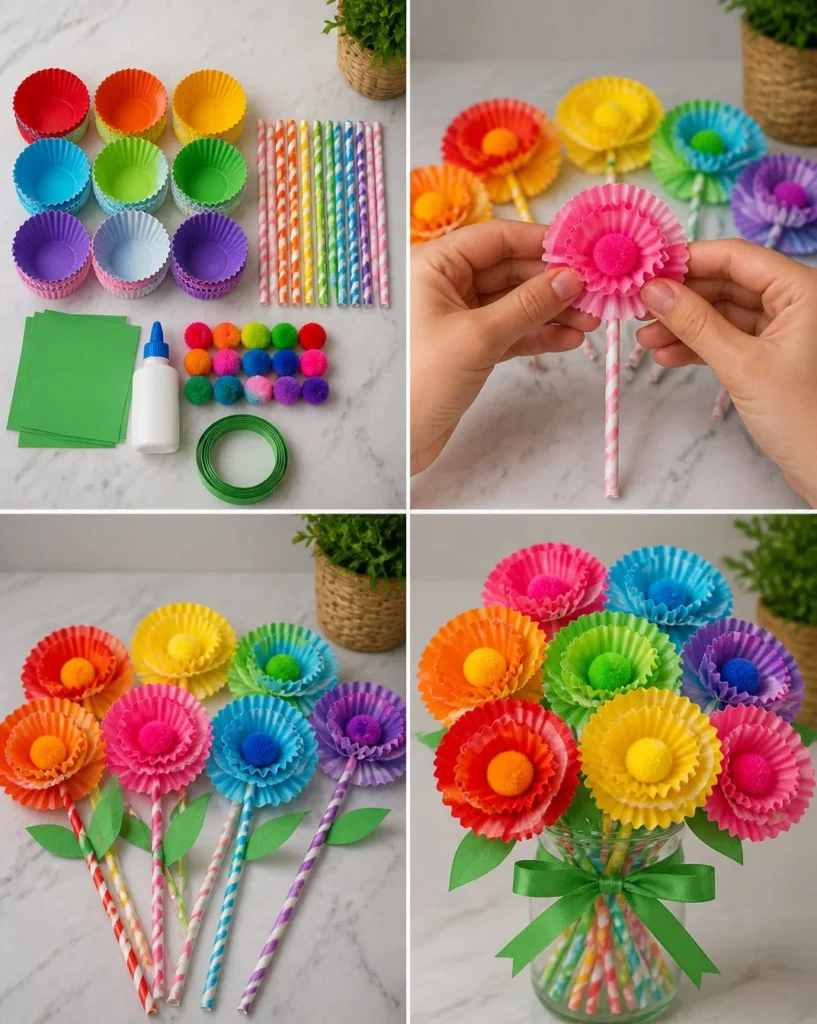
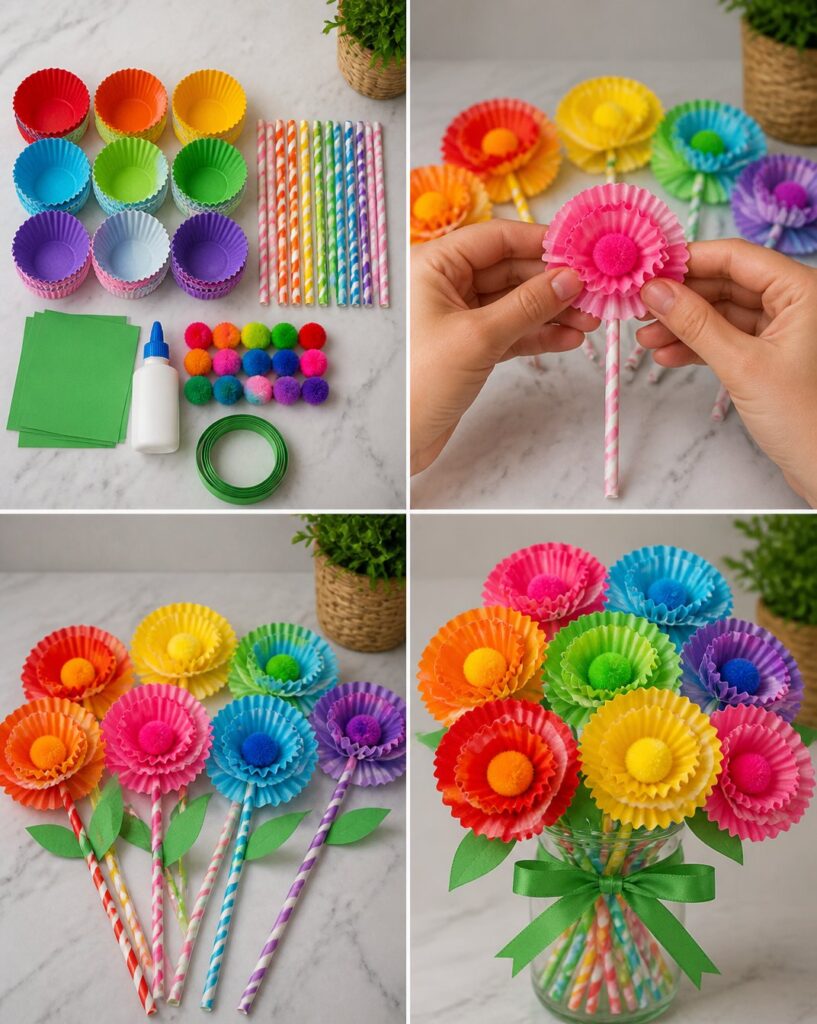
- 24 colorful cupcake liners
- 8 paper straws
- 8 pom-poms
- Green cardstock
- Craft glue
- Ribbon
Feel free to use any color of cupcake liners you have on hand. If you don’t have straws, sturdy sticks or even pipe cleaners can work!
How to Make Rainbow Cupcake-Liner Dahlia Bouquet
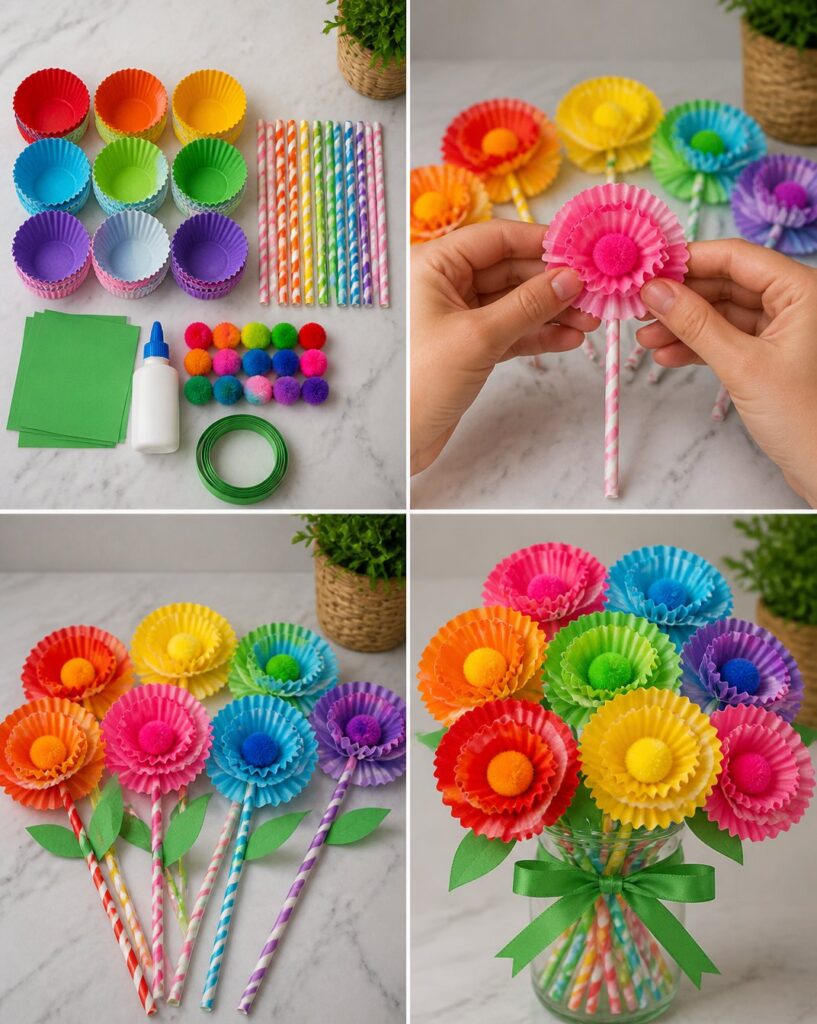
- Create the Flowers: Take three cupcake liners and stack them on top of each other. You can mix different colors for a more vibrant flower.
- Add the Center: Use craft glue to attach a pom-pom to the center of the stacked cupcake liners. This will be the flower’s center, giving it a three-dimensional look.
- Make the Stems: Take a paper straw and gently push the bottom of the cupcake-liner flower onto it. Glue the base of the flower to the straw to secure it.
- Add Leaves: Cut out leaf shapes from the green cardstock. You can make them as big or small as you like. Glue the leaves to the straw, positioning them a little below the flower.
- Finish the Bouquet: Gather your flowers together in a bunch and tie them with ribbon. You can create a bow or simply knot the ribbon for a rustic look.
Helpful Tips
- Layering: Don’t worry about making each layer perfect; a little asymmetry can make your flowers look more natural and lively.
- Cleaning Up: Use a small piece of cardboard or a disposable plate for glue to keep your workspace tidy.
- Drying: Allow the glued parts to sit for a bit before handling them too much to ensure everything stays in place. You can place them gently into a cup to keep the flowers upright while they dry.
- Working with Kids: Younger crafters may need help with cutting and gluing, so make sure to assist them with those parts.
Easy Variations
- Seasonal Colors: Use pastel liners for spring or red and green for Christmas-themed bouquets.
- Size Adjustment: Layer different numbers of cupcake liners to create smaller or larger flowers.
- Mixed Media: Incorporate other materials like fabric scraps or colored paper for added texture.
- Decorative Additions: Add glitter or stickers to the flower centers for a fun, sparkly touch.
Making This Craft With Kids
This project is suitable for kids, but they will need some supervision, especially when using glue and scissors. Younger children will likely need adult help with assembly, while older children can take on more of the project independently. It’s a great way to encourage creativity and teamwork!
How to Display or Use It
Your Rainbow Cupcake-Liner Dahlia Bouquet can brighten up any room! Consider placing it in a small vase or simply positioning it in a sunny spot to add a splash of color to your space. These bouquets are perfect for table centerpieces, gifts for any occasion, or even as party decorations. You can also wrap them in cellophane and tie them with ribbon to create charming, giftable arrangements.
Frequently Asked Questions
1. Can I use other materials for the flowers?
Yes! If you don’t have cupcake liners, you can use scrapbook paper or any colorful paper to create similar flowers.
2. How do I store them once they’re made?
Keep your bouquet in a cool, dry place. You can display it in a vase or gently wrap it in plastic to protect it if needed.
3. What if I run out of straws?
You can use sticks from trees (after removing any bark) or pipe cleaners to create stems instead.
4. How can I make the flowers bigger?
You can use more cupcake liners or bigger liners if you have them. Just stack them and follow the same steps!
5. Can I customize the bouquet further?
Absolutely! Feel free to add additional decorations like ribbons on the straw, decorative washi tape, or even colorful paint on the straws.
This Rainbow Cupcake-Liner Dahlia Bouquet is a joy to create, perfect for anyone looking to bring some fresh DIY charm into their lives. Enjoy crafting together!
Print
Rainbow Cupcake-Liner Dahlia Bouquet
- Total Time: 15 minutes
- Makes: 8 bouquets
Description
Create a colorful bouquet using cupcake liners to brighten any space with vibrant blooms.
Materials
- 24 colorful cupcake liners
- 8 paper straws
- 8 pom-poms
- Green cardstock
- Craft glue
- Ribbon
Instructions
- Create the flowers: Take three cupcake liners and stack them on top of each other.
- Add the center: Use craft glue to attach a pom-pom to the center of the stacked cupcake liners.
- Make the stems: Take a paper straw and gently push the bottom of the cupcake-liner flower onto it.
- Add leaves: Cut out leaf shapes from the green cardstock.
- Finish the bouquet: Gather your flowers together in a bunch and tie them with ribbon.
Notes
Supervise children when using glue and scissors. Encourage creativity and teamwork.