

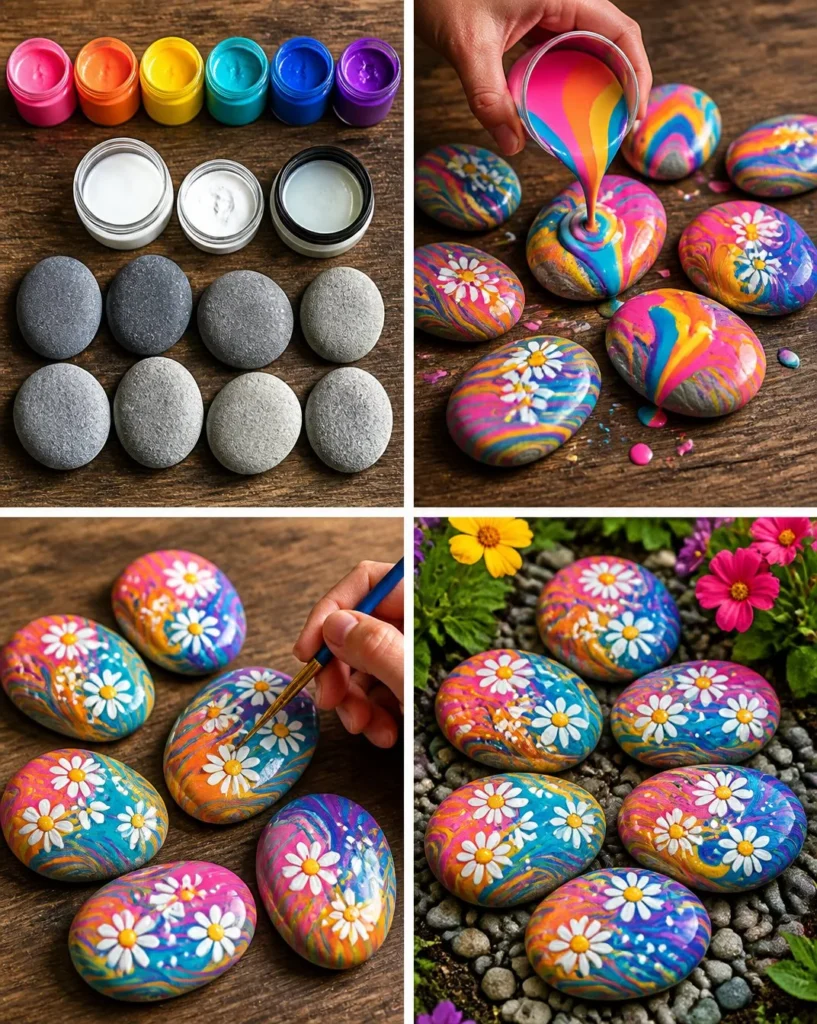
Rainbow Painted Rocks for a Colorful Flower Garden
Brightening up your garden doesn’t have to be a complicated task. With this fun and simple craft, you can transform ordinary rocks into vibrant, eye-catching decorations! These rainbow painted rocks will not only bring color to your outdoor space but can also serve as stepping stones or garden markers. This project is a delightful way for families to enjoy crafting together.
Using smooth rocks and a splash of colorful acrylic paint, you’ll create beautiful, unique designs that stand out among your flowers. So, grab your supplies, and let’s get started on making these Rainbow Painted Rocks for a Colorful Flower Garden!

Why You’ll Enjoy This Project
- Easy to Make: The steps are straightforward and require minimal materials, making it accessible for all ages.
- Colorful Décor: These rocks will add a bright and cheerful touch to your garden, bringing joy to all who see them.
- Incorporates Nature: Using natural materials like rocks encourages kids to connect with the outdoors.
- Creative Expression: Everyone can personalize their rocks, unleashing creativity and imagination.
- Durable Keepsakes: Once sealed, your painted rocks can withstand the elements, lasting for seasons to come.
Materials You’ll Need
- 8 smooth rocks (choose varying sizes for interest)
- Pink acrylic paint
- Orange acrylic paint
- Yellow acrylic paint
- Turquoise acrylic paint
- Blue acrylic paint
- Purple acrylic paint
- Pouring medium (to help achieve smooth swirls)
- White paint (for flowers)
- Outdoor sealer (to protect your artwork)
Make sure to select rocks that are smooth and flat. If you can’t find smooth rocks, any clean, sturdy stone will work, but the finishing might slightly vary.

How to Make Rainbow Painted Rocks for a Colorful Flower Garden
Step 1: Create Colorful Swirls
Pour a small amount of several colors of acrylic paint across each rock. You can layer them or swirl them together for a marbled effect. Use the pouring medium to help the paint flow smoothly across the rock’s surface.
Step 2: Let It Dry
Allow the painted rocks to dry completely. This step is important to ensure that the next layer of paint adheres well. Depending on your paint’s thickness, this may take a few hours. Keep them in a well-ventilated area.
Step 3: Paint White Flowers
Once the rocks are dry, take your white paint and a small brush to paint simple flower designs on top of the colorful backgrounds. You can create daisies, tulips, or any flower shape you like. Keep it light and fun!
Step 4: Seal Your Rocks
After the white flowers have dried, apply an outdoor sealer according to the instructions on the product. This will help protect your rocks from weather and keep the colors vibrant. Allow the sealer to dry fully before using the rocks in your garden.
Helpful Tips
- Mixing Colors: If you want new colors, mix a couple of the acrylic paints together before pouring.
- Using Old Containers: You can use small cups or containers that are recyclable for pouring the paints, making cleanup easier.
- Placement While Drying: Lay the rocks on a clean surface like a sheet of wax paper to prevent them from sticking.
- Create a Theme: Consider painting rocks to match a particular theme or season, like spring flowers or holiday colors.
Easy Variations
- Seasonal Colors: Adjust the acrylic paint colors according to the seasons—pastels for spring, bright colors for summer, earthy tones for fall, and cool colors for winter.
- Patterns Instead of Flowers: Instead of flowers, try painting polka dots, stripes, or any geometric patterns.
- Larger Designs: Use larger rocks for bigger painted designs or quotes to make a bold statement.
- Glow-in-the-Dark Paint: Add glow-in-the-dark paint to make your rocks visible at night.
- Animal Shapes: Paint your rocks to resemble simple animals (like ladybugs or frogs) to add a playful element.
Making This Craft With Kids
This project is perfect for children with adult supervision during painting and sealing, especially when working with acrylics and sealers. It’s a great way for kids to express creativity and practice fine motor skills. Guide them in pouring and swirling the paint, and let their imaginations take charge in designing their flowers!
How to Display or Use It
These vibrant rocks can be placed throughout your garden, creating colorful spots among your plants. You can also use them as markers for plant names or even line a pathway. If you feel like gifting them, decorate a small basket with the finished rocks for a unique present. They also make lovely conversation pieces when arranged in planters or displayed on a porch.

Frequently Asked Questions
1. Can I do this project indoors?
Yes, just make sure you cover your surfaces to protect against paint spills and provide good ventilation.
2. How durable are these painted rocks?
Once sealed, they are suitable for outdoor use and can withstand rain and sunlight.
3. What if I don’t have pouring medium?
You can still achieve nice swirls by using regular acrylic paint. Just pour it slowly and carefully over the rock.
4. Can I use other types of paint?
Acrylic paint is best for this project. Other paints may not stick or might not last outdoors.
5. How do I clean my brushes after painting?
Rinse your brushes immediately after use with soap and water to prevent the paint from hardening.
6. How do I store the rocks if I want them to last?
Store them in a cool, dry place if you’re not using them immediately and keep them away from moisture.

Rainbow Painted Rocks for a Colorful Flower Garden
- Total Time: 190 minutes
- Makes: 8 painted rocks
Description
Transform ordinary rocks into vibrant decorations for your garden with this fun and simple craft project.
Materials
- 8 smooth rocks (choose varying sizes for interest)
- Pink acrylic paint
- Orange acrylic paint
- Yellow acrylic paint
- Turquoise acrylic paint
- Blue acrylic paint
- Purple acrylic paint
- Pouring medium (to help achieve smooth swirls)
- White paint (for flowers)
- Outdoor sealer (to protect your artwork)
Instructions
- Pour a small amount of several colors of acrylic paint across each rock for a marbled effect.
- Allow the painted rocks to dry completely, keeping them in a well-ventilated area.
- Use a small brush and white paint to create simple flower designs on the dried rocks.
- Apply an outdoor sealer to protect your rocks, allowing it to dry fully before using.
Notes
Mix colors to create new shades, use recyclable containers for pouring paint, and consider theming your designs seasonally.