

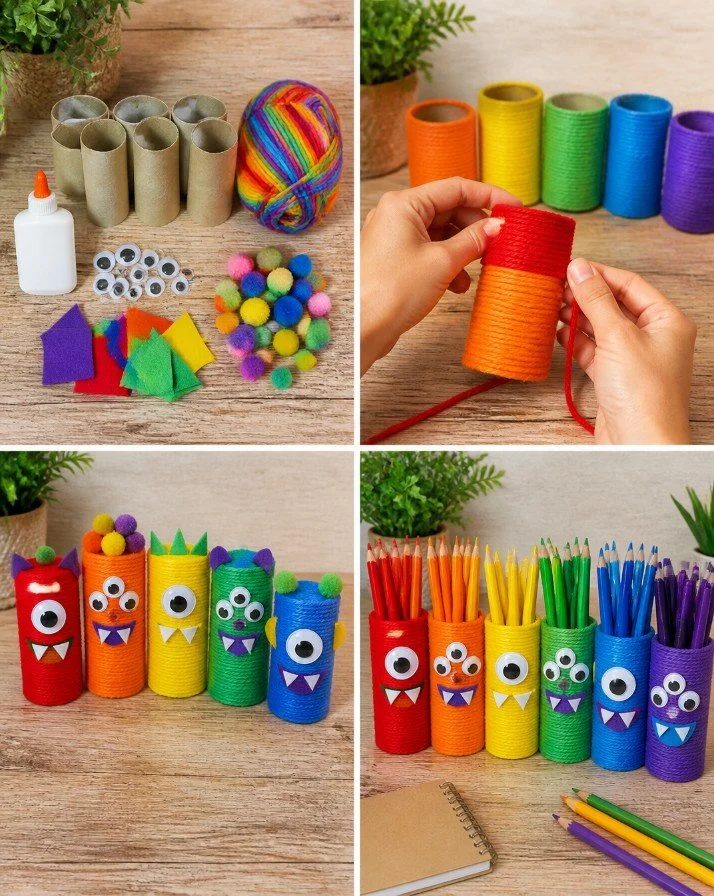
Why You’ll Enjoy This Project
Rainbow Monster Pencil Holders are a delightful way to bring vibrancy and creativity into any workspace! Not only do they serve a practical purpose by keeping your pencils and markers organized, but they also add a splash of color and charm to your desk or craft area. This project is perfect for family crafting time because it uses common materials, allowing everyone to get involved without breaking the bank. Plus, the opportunity to create goofy faces on your monsters means plenty of laughter and fun while crafting!
Materials You’ll Need
- 6 cardboard tubes (like those from paper towels or toilet paper)
- Rainbow yarn (choose six vivid colors)
- Craft glue
- Googly eyes (mismatched sizes are fun!)
- Felt scraps (various colors for teeth and ears)
- Pom-poms (for extra flair)
Feel free to substitute the yarn with any colorful string or ribbon you have on hand. Ensure the cardboard tubes are sturdy enough to hold up as pencil holders.
How to Make Rainbow Monster Pencil Holders
- Wrap the Yarn
Take the first cardboard tube and begin wrapping it with one vivid color of yarn. Make sure to cover it completely. Press down the yarn tightly as you go, and secure the end with a bit of craft glue if needed. Repeat this step for each of the six tubes, using a different color for each one. - Add Googly Eyes
Once the tubes are wrapped, use craft glue to attach mismatched googly eyes on top of each tube. Feel free to get creative—let the eyes be big, small, or even in different directions to add some personality! - Create Fun Features
Cut out shapes from your felt scraps to make silly teeth and ears. For teeth, triangles work great, and for ears, simple rounded shapes are effective. Glue these features onto your monsters where you like. - Finalize with Pom-Poms
Add a few pom-poms to each monster for a playful look! These can act as noses or just fun decorations. Attach them using craft glue, ensuring they stick well. - Fill with Supplies
Once everything is dry, fill each finished monster with your favorite pencils and markers. Now you have functional and friendly desk companions!
Helpful Tips
- Easier Assembly: If kids are helping, consider pre-cutting the felt shapes to save time.
- Cleaner Results: Work on a craft mat or paper to manage any glue spills. This makes cleanup much easier.
- Handling Materials: Encourage little hands to press the yarn tightly as they wrap—it will help keep everything neat.
- Placement: Allow the glue to dry completely before moving the pencil holders to avoid mishaps.
- Display Your Creations: These monster holders make great desk buddies, so don’t be shy about showing them off!
Easy Variations
- Use different shades of the same color for a more subtle look.
- Decorate with stickers, stamps, or even paint designs on the cardboard tubes before adding yarn.
- Make larger or smaller versions by using different sized tubes.
- Create seasonal designs, such as adding spooky features for Halloween or festive colors for holidays.
- Use recycled materials, like plastic bottles cut in half, to make unique monster holders.
Making This Craft With Kids
This project is perfect for children ages 5 and up, with adult supervision recommended when using craft glue and scissors. Kids will love choosing yarn colors and creating their own monster faces. You may want to assist with wrapping the yarn if younger kids find it tricky on their own.
How to Display or Use It
Your Rainbow Monster Pencil Holders can liven up any workspace at home, in the classroom, or even on a craft table. They make great gifts for teachers or friends, especially if filled with colorful writing supplies or candy. Set them on a shelf or a desk so that they can brighten up your day as you work!
Frequently Asked Questions
1. How do I secure the yarn better?
If the yarn is slipping, use a small dot of glue every few inches as you wrap, then secure the end with a larger amount when finished.
2. Can I use different types of eyes?
Absolutely! Feel free to use buttons, beads, or any other fun objects you have at home for eyes.
3. What if I don’t have felt?
You can use paper instead! Cut shapes from colored construction paper to achieve a similar effect.
4. How can I make my monster more unique?
Add other embellishments like glitter, sequins, or fabric scraps to give each monster its own personality.
5. How do I clean up after crafting?
Use warm soapy water for any glue spills, and gather any loose materials into a bin or bag for easy disposal.
Enjoy crafting your colorful Rainbow Monster Pencil Holders! They’re sure to bring smiles to all who use them.
Print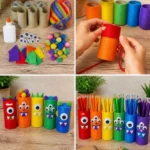
Rainbow Monster Pencil Holders
- Total Time: 30 minutes
- Makes: 6 pencil holders
Description
Brighten up your workspace with these fun and colorful Rainbow Monster Pencil Holders made from simple materials.
Materials
- 6 cardboard tubes (like those from paper towels or toilet paper)
- Rainbow yarn (choose six vivid colors)
- Craft glue
- Googly eyes (mismatched sizes)
- Felt scraps (various colors for teeth and ears)
- Pom-poms (for extra flair)
Instructions
- Wrap the Yarn by taking the first cardboard tube and begin wrapping it with one color of yarn until covered completely.
- Add Googly Eyes by gluing mismatched eyes on top of each tube.
- Create Fun Features by cutting shapes from felt scraps for silly teeth and ears and gluing them onto the monsters.
- Finalize with Pom-Poms by adding a few for decoration using craft glue.
- Fill with Supplies after everything dries, making your monsters functional desk companions.
Notes
For easier assembly, pre-cut the felt shapes if kids are assisting. Consider using stickers for decoration instead of felt.