
First-Day Rainbow Pencil Butterfly Suncatcher
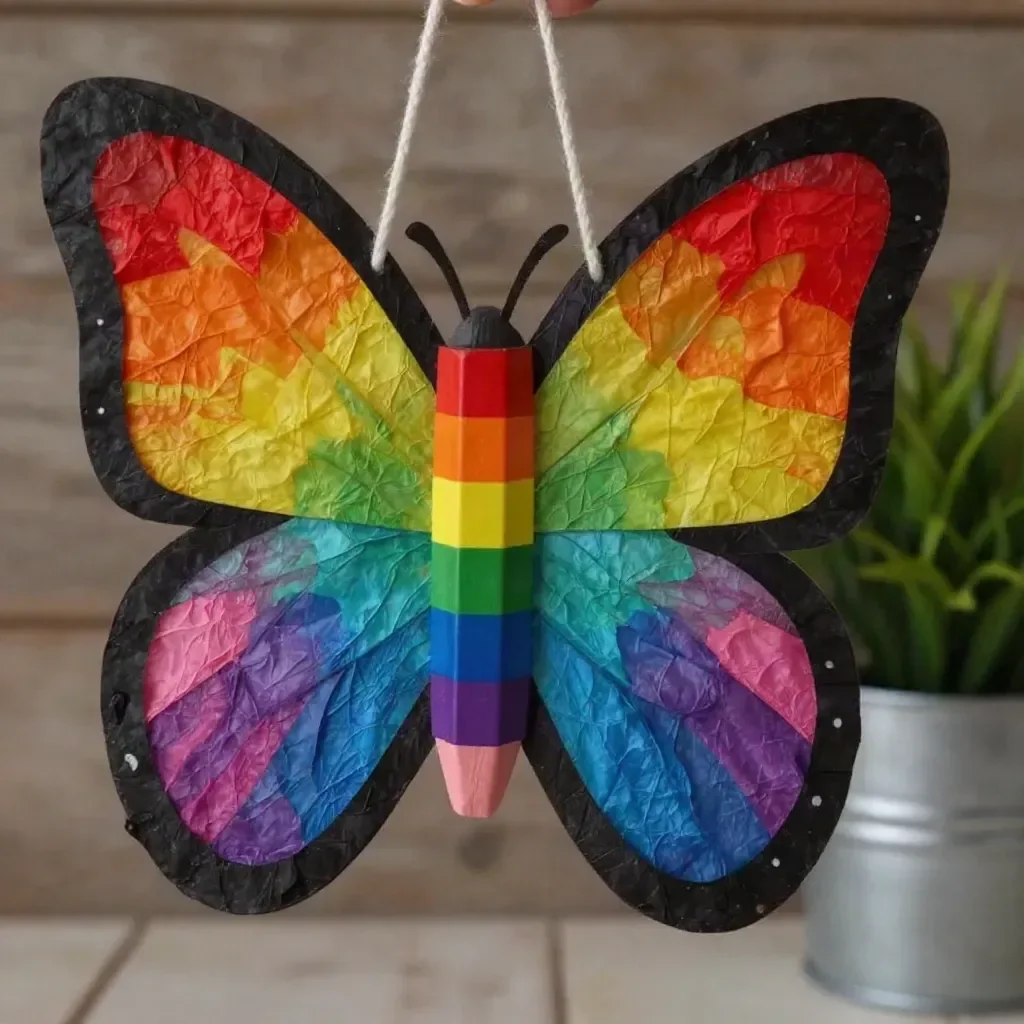
Get ready to bring a splash of color into your classroom with the First-Day Rainbow Pencil Butterfly Suncatcher. This delightful craft combines the whimsical shape of a butterfly with the vibrant hues of a rainbow, making it an inspiring decoration for the first day of school. Using everyday materials such as clear contact paper, black cardstock, and colorful tissue paper, you’ll create a stunning piece that captures light beautifully, transforming it into a sparkling accent for your window. You may also find Melted Crayon Rainbow Haunted House Suncatcher Craft useful.
This project is approachable and satisfying, even for those new to crafting. The process not only helps develop creativity but also serves as a great activity for kids and their parents to enjoy together. Plus, if you’re looking for more colorful suncatcher ideas to explore, take a look at this rainbow crystal butterfly suncatcher craft for additional inspiration!
Materials You’ll Need
Before diving into the fun, gather your materials:
- Clear contact paper
- Black cardstock
- Pencil-shaped paper strips
- Rainbow tissue
- Clear pink cellophane
- Clear blue cellophane
- Glitter
- String

Step-by-Step Instructions
Let’s get started on making your First-Day Rainbow Pencil Butterfly Suncatcher!
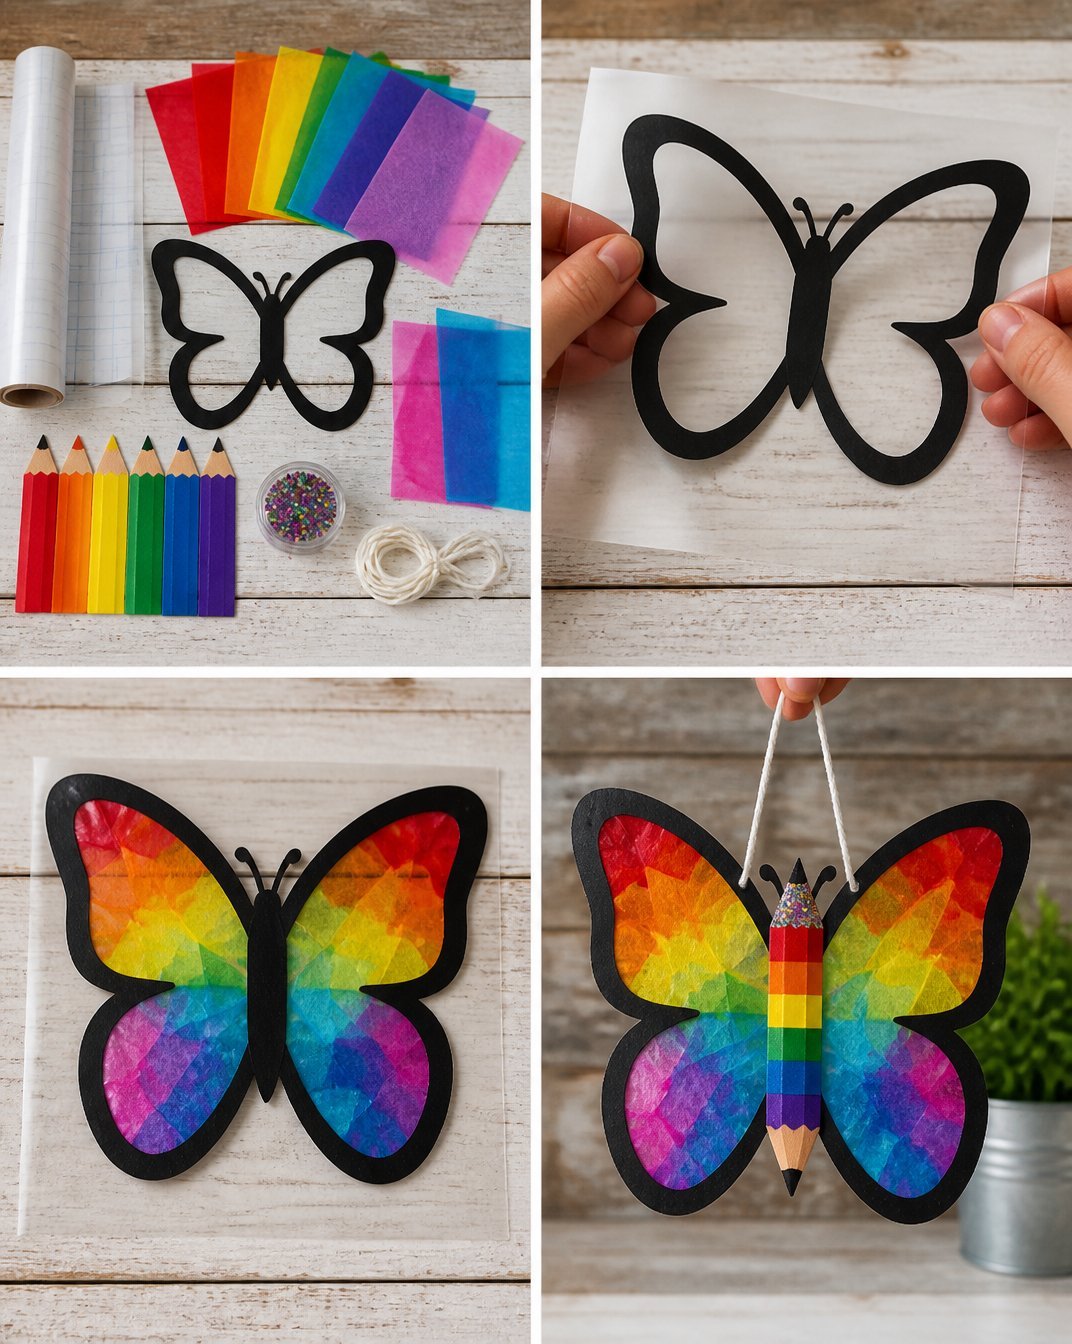
Cut Your Butterfly Outline: Begin by cutting a butterfly shape from the black cardstock. You can use templates or draw your own design to ensure unique shapes. Aim for an outline that features an interesting movement of wings and a size that will look great in your window.
Prepare the Contact Paper: Take a piece of clear contact paper and lay your butterfly outline on top of it. Make sure there’s enough contact paper around the edges to accommodate the wings.
Fill the Wings with Color: Next, it’s time to fill your butterfly’s wings with the rainbow tissue, clear pink, and clear blue cellophane. Cut the tissue into small squares and layer it neatly to create a vibrant and colorful effect. When layering, feel free to sprinkle in some glitter to add extra sparkle to your creation.
Craft the Butterfly Body: You will then assemble the butterfly body to resemble a colorful pencil. Use the pencil-shaped paper strips to form the pencil body, ensuring to incorporate vibrant colors that pop against the black wings.
Seal and Hang Your Suncatcher: Once you’ve arranged everything to your liking, seal it carefully with another piece of clear contact paper, making sure no edges are left open. Cut around the edges of the butterfly and then hang it in a sunny spot, such as a classroom window, to watch it shine brilliantly on the first day of school.
Tips for Best Results
Getting the Colors Right: When selecting tissue paper, you can choose varying shades of the same color for a gradient effect. This technique adds depth and visual interest to your suncatcher.
Creating the Crystal Effect: If you’d like to elevate your suncatcher’s sparkle further, consider using clear glitter glue or gems in place of some tissue squares. This will give a beautiful crystal-like look when the sun hits it.
For those interested in trying out other fun activities, check out the melted crayon rainbow butterfly suncatcher project for another creative idea!
Display Ideas
Your suncatcher can easily become a centerpiece in your classroom. Hang it from string at different heights to create a layered effect, or group several suncatchers together for a spectacular display. By using various colors and designs, you can transform the classroom into a bright, welcoming space for students.
Frequently Asked Questions
How do I hang my suncatcher?
You can attach it to the window using string, fishing line, or removable adhesive hooks that won’t damage surfaces.
Can I use different colors?
Absolutely! Experiment with different tissue colors to match your classroom theme or the season.
What should I do if I need to make this craft with younger children?
Always supervise young children when using scissors or small materials, and consider pre-cutting shapes for younger crafters to assemble.
Conclusion
Creating a First-Day Rainbow Pencil Butterfly Suncatcher is a wonderful way to welcome students back to school. Not only is it a fun and engaging project, but it also adds a touch of handcrafted beauty to your classroom environment. For more craft supplies, you might consider checking out options available on Amazon for suncatcher craft kits. Enjoy your crafting adventure!
Print
First-Day Rainbow Pencil Butterfly Suncatcher
- Total Time: 30 minutes
- Makes: 1 suncatcher
Description
A vibrant and engaging suncatcher craft that brings color to your classroom, perfect for the first day of school.
Materials
- Clear contact paper
- Black cardstock
- Pencil-shaped paper strips
- Rainbow tissue
- Clear pink cellophane
- Clear blue cellophane
- Glitter
- String
Instructions
- Cut your butterfly outline from the black cardstock.
- Prepare a piece of clear contact paper for your butterfly outline.
- Fill the wings with rainbow tissue and clear cellophane pieces.
- Craft the butterfly body using the colorful pencil-shaped paper strips.
- Seal the suncatcher with another layer of clear contact paper.
- Hang your completed suncatcher in a sunny spot.
Notes
Experiment with different tissue colors and layering techniques for unique effects.