
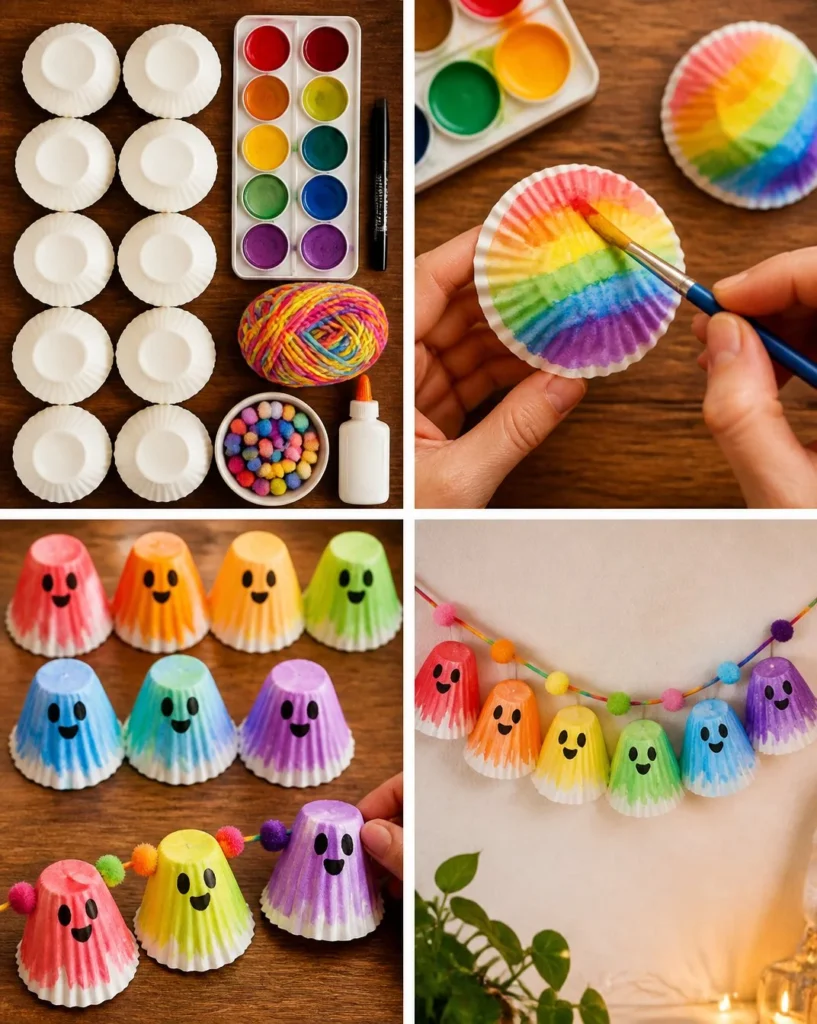
Rainbow Ghost Cupcake-Liner Garland
Creating a Rainbow Ghost Cupcake-Liner Garland is a delightful and straightforward craft that brings a fun and colorful twist to your autumn decorations. This project is enjoyable because it combines painting, drawing, and stringing together colorful items, making it perfect for families looking to spend some quality time together. You’ll be making a whimsical garland that adds a splash of personality to your home, especially around Halloween!
Through this tutorial, we’ll guide you step-by-step to craft cheerful ghostly figures using simple materials that you might already have at home. In just a few easy steps, you’ll have a charming garland that adds a festive vibe to any space. Let’s get started!
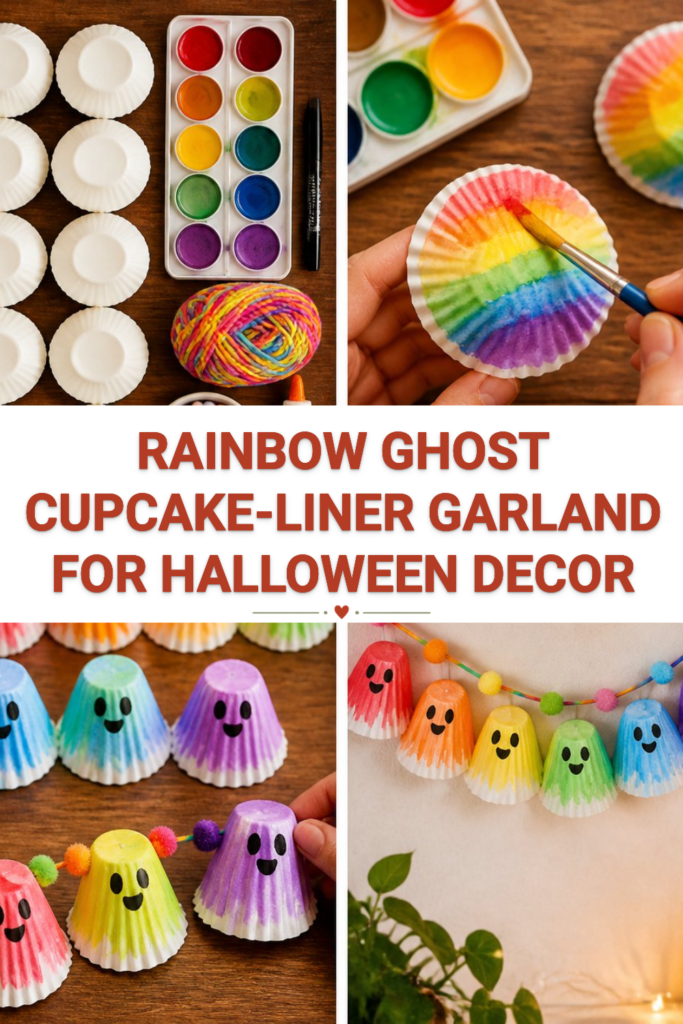
Why You’ll Enjoy This Project
- Simple and Fun: Perfect for crafters of all ages, making it a joyful activity for families or a classroom project.
- Creative Expression: The rainbow washes and friendly ghost faces allow for personal creativity, making each piece unique.
- Budget-Friendly: Uses inexpensive and commonly available materials, making crafting easy on the wallet.
- Eco-Friendly: Opportunity to incorporate recycled items and nature finds, promoting sustainability in craft projects.
- Versatile Display Options: Great for decorating your home, giving as gifts, or using in classroom settings.
Materials You’ll Need
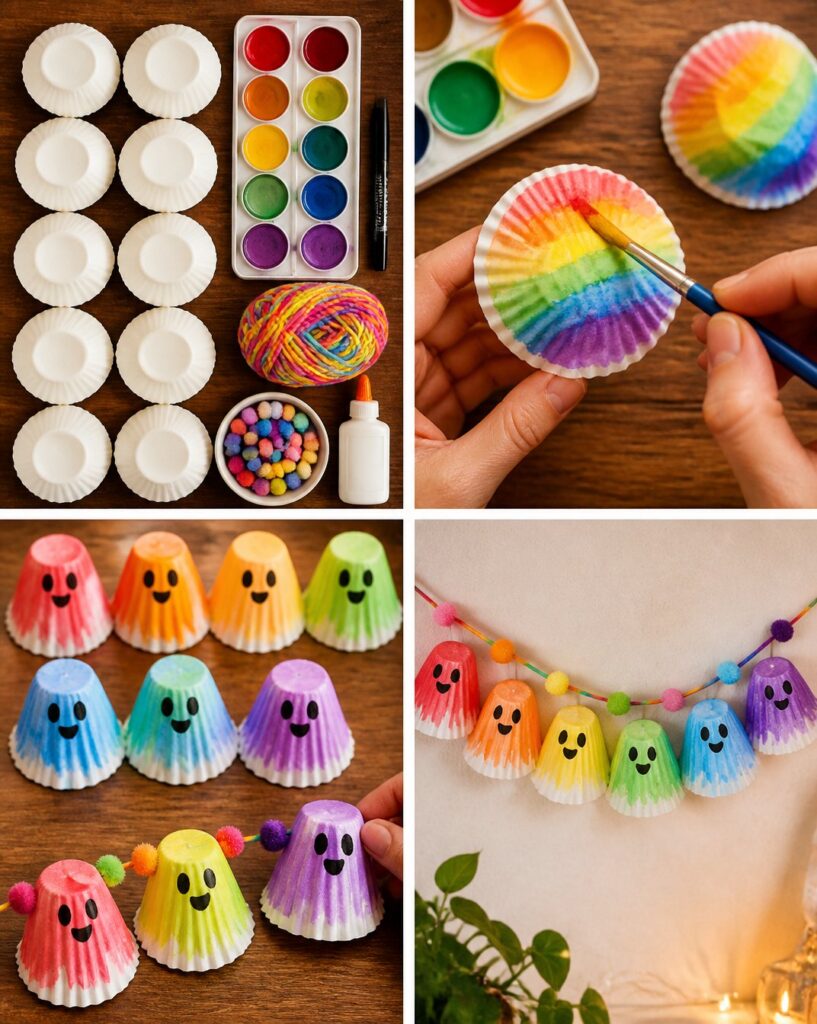
- 12 white cupcake liners
- Rainbow watercolor paint
- Black marker
- Rainbow yarn
- Mini pom-poms
- Glue
Feel free to get creative with your choice of colors for the rainbow washes. Using watercolor is great, but you can also use markers or crayons if that’s what you have on hand.
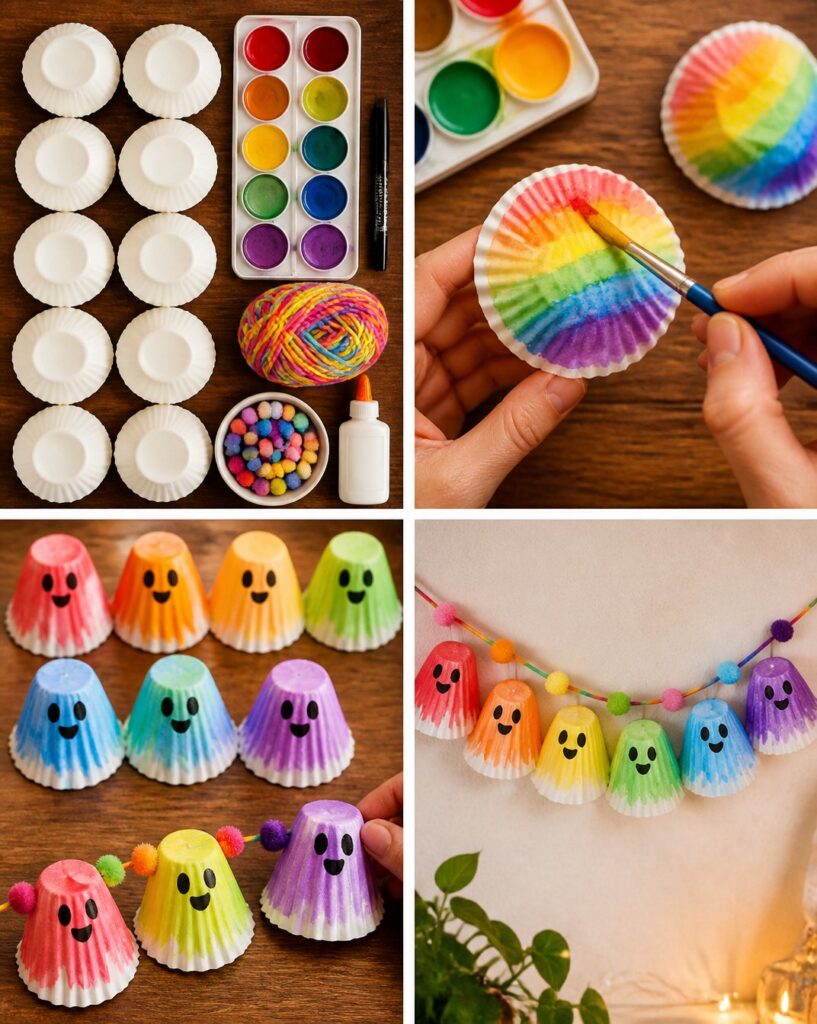
How to Make Rainbow Ghost Cupcake-Liner Garland
- Paint the Cupcake Liners
Start by painting the bottoms of the cupcake liners. Use soft rainbow washes, blending colors together gently for a beautiful effect. - Draw Ghost Faces
Once the paint has dried, turn the liners upside down. With the black marker, draw friendly ghost faces. Simple round eyes and a little smiling mouth work great! - String It All Together
Take your colorful yarn and thread it through the center of each ghost. You can alternate the cupcake liners with mini pom-poms for an extra pop of color and whimsy.
Helpful Tips
- Drying Time: Allow enough time for the paint to dry completely before drawing on the ghost faces to avoid smudging.
- Easy Assembly: When stringing the ghosts together, you can tie a small knot after each ghost to keep them spaced out evenly.
- Placement: Hang the garland in a spot where it can easily be seen, such as across a mantel, over a doorway, or along a window.
Easy Variations
- Color Themes: Try different color palettes based on holidays (like pastels for Easter or warm tones for fall).
- Ghost Faces: Experiment with different types of expressions – frightened, silly, or even spooky.
- Add Lights: String fairy lights through the garland for a magical glow at night.
- Size Adjustments: Use smaller or larger cupcake liners to change the size of your ghosts.
- Nature Finds: Incorporate small leaves or twigs as part of the decoration between the ghosts.
Making This Craft With Kids
This project is a wonderful way for kids to express their creativity! You might want to supervise the painting part to ensure they don’t use too much water or get overly messy. Help them with sharpie faces if they’re too young, and let them handle stringing the cups together as they can easily practice threading.
How to Display or Use It
Once your Rainbow Ghost Cupcake-Liner Garland is ready, display it proudly! Hang it across a wall, drape it along a table setting, or use it as a backdrop for fall festivities. You can even give it as a gift to friends or neighbors to brighten their day!
Frequently Asked Questions
1. How do I clean up after painting?
Use water for watercolor paint, and make sure to set up a designated crafting area with newspaper or an old tablecloth to catch any spills.
2. Can I use something other than cupcake liners?
Yes! You could also use paper plates or even construction paper cutouts.
3. What if the paint runs while drying?
Make sure not to apply too much water while painting, and allow each layer to dry completely.
4. Can this garland be stored for next year?
Absolutely! Just keep it in a dry, safe place. Avoid folding it to maintain its shape.
5. Is this project mess-friendly?
Crafting can be a bit messy, so you might want to cover surfaces and wear old clothes while engaging in this project.
Rainbow Ghost Cupcake-Liner Garland
- Total Time: 30 minutes
- Makes: 1 garland
Description
Create a whimsical garland of ghost figures using colorful cupcake liners, perfect for autumn and Halloween decorations.
Materials
- 12 white cupcake liners
- Rainbow watercolor paint
- Black marker
- Rainbow yarn
- Mini pom-poms
- Glue
Instructions
- Start by painting the bottoms of the cupcake liners. Use soft rainbow washes, blending colors together gently for a beautiful effect.
- Once the paint has dried, turn the liners upside down. With the black marker, draw friendly ghost faces. Simple round eyes and a little smiling mouth work great!
- Take your colorful yarn and thread it through the center of each ghost. You can alternate the cupcake liners with mini pom-poms for an extra pop of color and whimsy.
Notes
Allow enough time for the paint to dry completely before drawing on the ghost faces to avoid smudging. Tie a small knot after each ghost when stringing together to keep them spaced out evenly.