
Back-to-School Rainbow Pencil Flower Bouquet
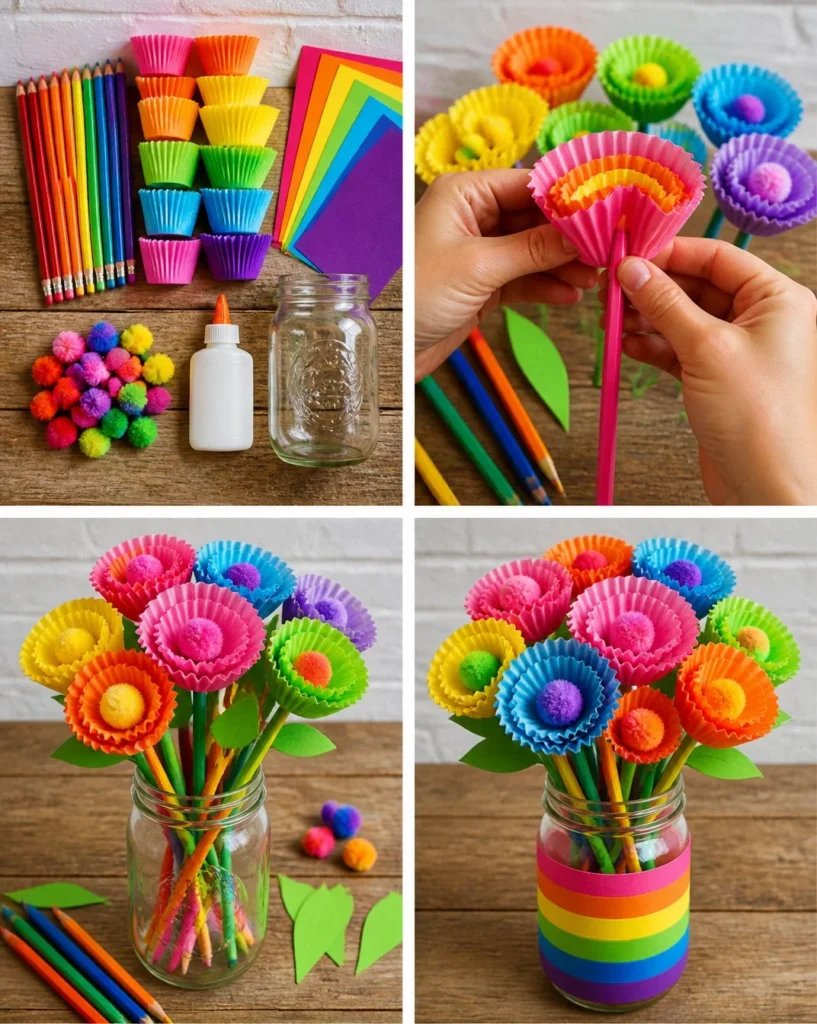
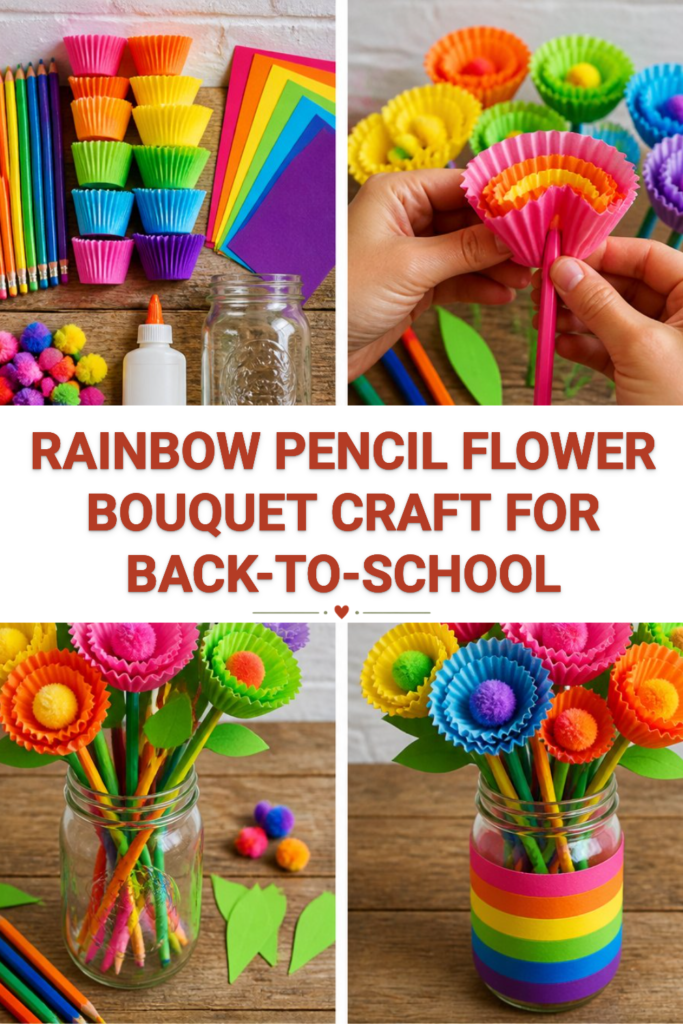
Creating a Back-to-School Rainbow Pencil Flower Bouquet is a delightful way to add color and cheer to any classroom or study space. This project combines fun craft materials with a bright, whimsical design that kids and adults alike will enjoy. By using simple items like pencils and cupcake liners, you can make a bouquet that not only looks lovely but also serves a practical purpose—those pencils are perfect for taking notes or doodling!
Whether it’s a thoughtful gift for a teacher, a festive decoration for your desk, or a playful project to do with the kids, this craft captures the spirit of creativity and the joy of learning. Let’s dive in and make something beautiful together!
Why You’ll Enjoy This Project
- Encourages Creativity: Kids can choose their favorite colors for the flowers and really make this project their own.
- Functional Decoration: This bouquet not only looks great but serves as a handy holder for pencils, making it both decorative and useful.
- Easy to Make: The steps are simple and straightforward, making it great for beginners or those crafting with children.
- Minimal Materials: You don’t need a lot of expensive supplies; everything here is easy to find and often already at home or school.
- Perfect for All Ages: This craft is enjoyable for everyone, whether you’re a parent, grandparent, teacher, or a crafty adult.
Materials You’ll Need
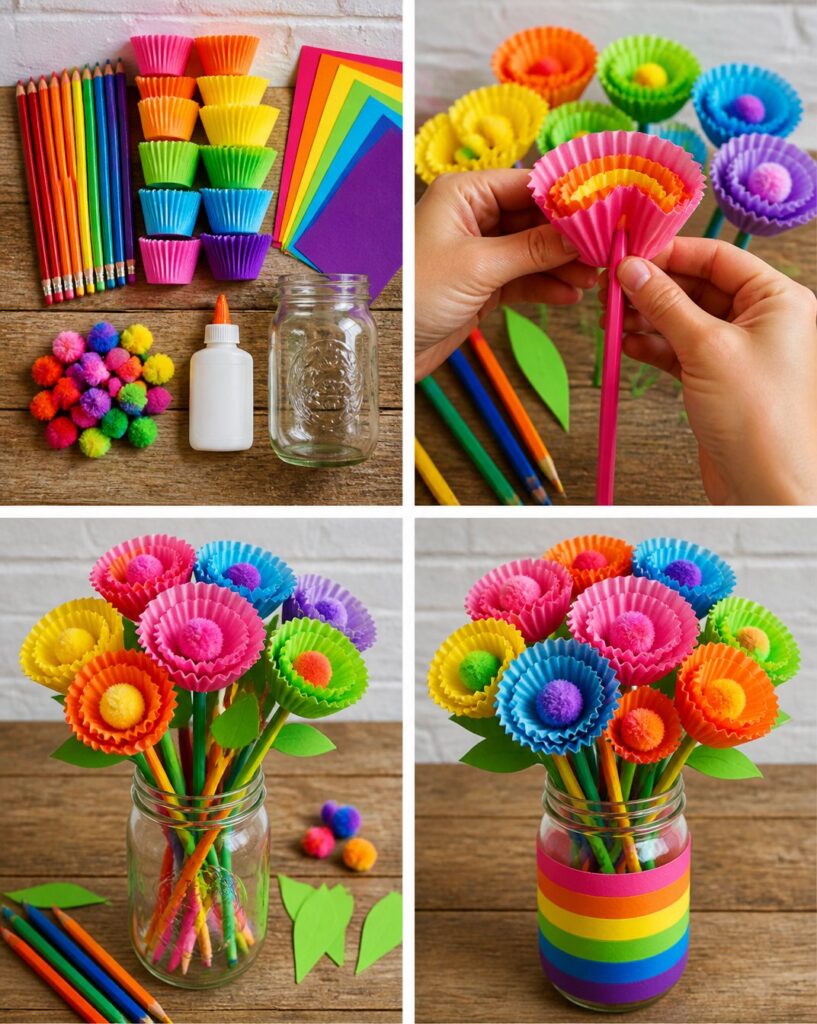
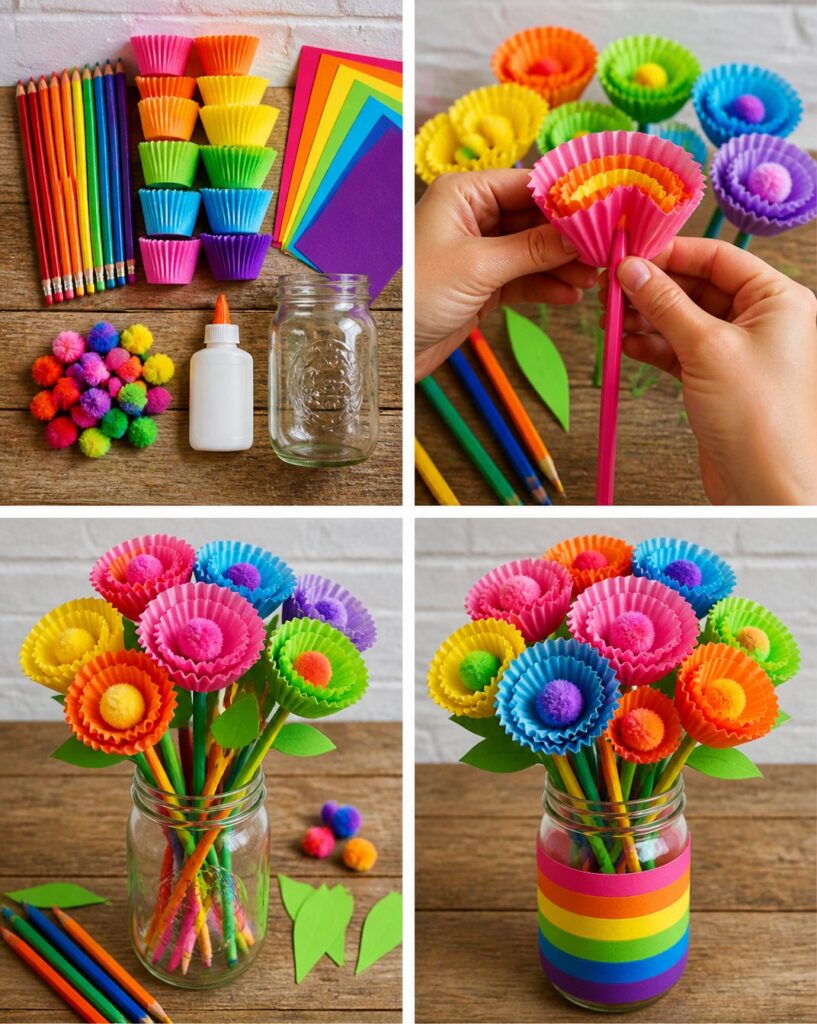
- 12 pencils
- 18 cupcake liners
- Rainbow cardstock
- Pom-poms
- Glue
- Mason jar
Feel free to substitute similar materials if you don’t have something on hand. For example, if you don’t have rainbow cardstock, any colored paper will work just fine!
How to Make Back-to-School Rainbow Pencil Flower Bouquet
Step 1: Create Flower Shapes
Take the cupcake liners and layer them together to form flower shapes. You can use 2-3 liners per flower for a fuller look. Try to stagger the liners so they look like blooming petals.
Step 2: Assemble the Stems
Use the pencils as stems. Poke them through the center of each layered cupcake liner until the bottoms are secured but the flowers can still move slightly.
Step 3: Add Leaves
Cut out leaf shapes from the rainbow cardstock. You can use scissors to make simple leaf shapes—no need for perfection! Glue the leaves to the pencils at different heights for a more natural look.
Step 4: Add Cheerful Centers
Add a pom-pom to the center of each flower for a cheerful touch. Simply use a dab of glue to stick the pom-pom in the middle of each flower for a vibrant finish.
Step 5: Arrange in a Jar
Finally, arrange your pencil flowers inside a decorated mason jar. You can add some decorative stones or beads at the bottom if you’d like to hold the stems in place and add some extra flair.
Helpful Tips
- Layering: When layering the cupcake liners, try to slightly offset them so that the petals are visible from all angles.
- Glue Placement: For cleaner results, apply glue just to the bottom of the pom-poms and leaves to prevent a mess.
- Display Ideas: You can decorate the mason jar with washi tape or ribbon to match the colors of your flowers for a cute finish.
- Handling Pencils: If young children are crafting, supervise the poking of pencils through the cupcake liners to ensure safety.
Easy Variations
- Color Choices: Use themed cupcake liners and cardstock for specific holidays, like red and green for Christmas or pastels for spring.
- Flower Size: Adjust the number of cupcake liners used to create either larger or smaller flowers.
- Alternative Stems: Instead of pencils, you could use thin dowels or straws to create a different effect.
- Seasonal Decor: Change the colors of the pom-poms to match the seasons—like orange for fall or pink for spring.
Making This Craft With Kids
This project is an excellent choice for crafting with kids! Younger children might need some help with cutting out the leaves and placing the pom-poms. Make sure to supervise when they’re using scissors and help them be careful with the glue to avoid a sticky mess.
How to Display or Use It
Your Back-to-School Rainbow Pencil Flower Bouquet can brighten up a desk, serve as a unique gift for a teacher, or be a fun centerpiece for a classroom. You can also use it as a colorful organizer for pens and pencils at home. When school starts, it’s a fantastic way to welcome a new year while keeping supplies in easy reach!
Frequently Asked Questions
1. Can I use different types of pencils?
Yes! Colored pencils, mechanical pencils, or even markers can work well for this project.
2. What if I don’t have pom-poms?
You can skip them or use buttons, beads, or any small decorative items for the flower centers instead.
3. How long does this take to make?
This project can typically be completed in about 30 minutes to an hour, depending on how elaborate you want to make your flowers.
4. Can I display this outside?
It’s best to keep it indoors, as the materials may not withstand outdoor elements like rain or strong sun.
5. What if my petals don’t stay in place?
Make sure to secure your layers well with enough pressure when poking the pencil through and consider using a stronger glue if needed.
Enjoy your crafting time and the beautiful results of your Back-to-School Rainbow Pencil Flower Bouquet!
Print
Back-to-School Rainbow Pencil Flower Bouquet
- Total Time: 40 minutes
- Makes: 1 bouquet
Description
A fun and colorful craft that combines pencils and cupcake liners to create a delightful flower bouquet, perfect for classroom decor.
Materials
- 12 pencils
- 18 cupcake liners
- Rainbow cardstock
- Pom-poms
- Glue
- Mason jar
Instructions
- Create flower shapes by layering cupcake liners together.
- Assemble the stems using pencils poked through the flower layers.
- Add leaf shapes cut from rainbow cardstock to the pencils.
- Add pom-poms to the center of each flower for decoration.
- Arrange the flowers in a decorated mason jar for display.
Notes
Supervise children when using scissors and glue. Decorate mason jars with washi tape or ribbon for extra flair.